The Finished Build
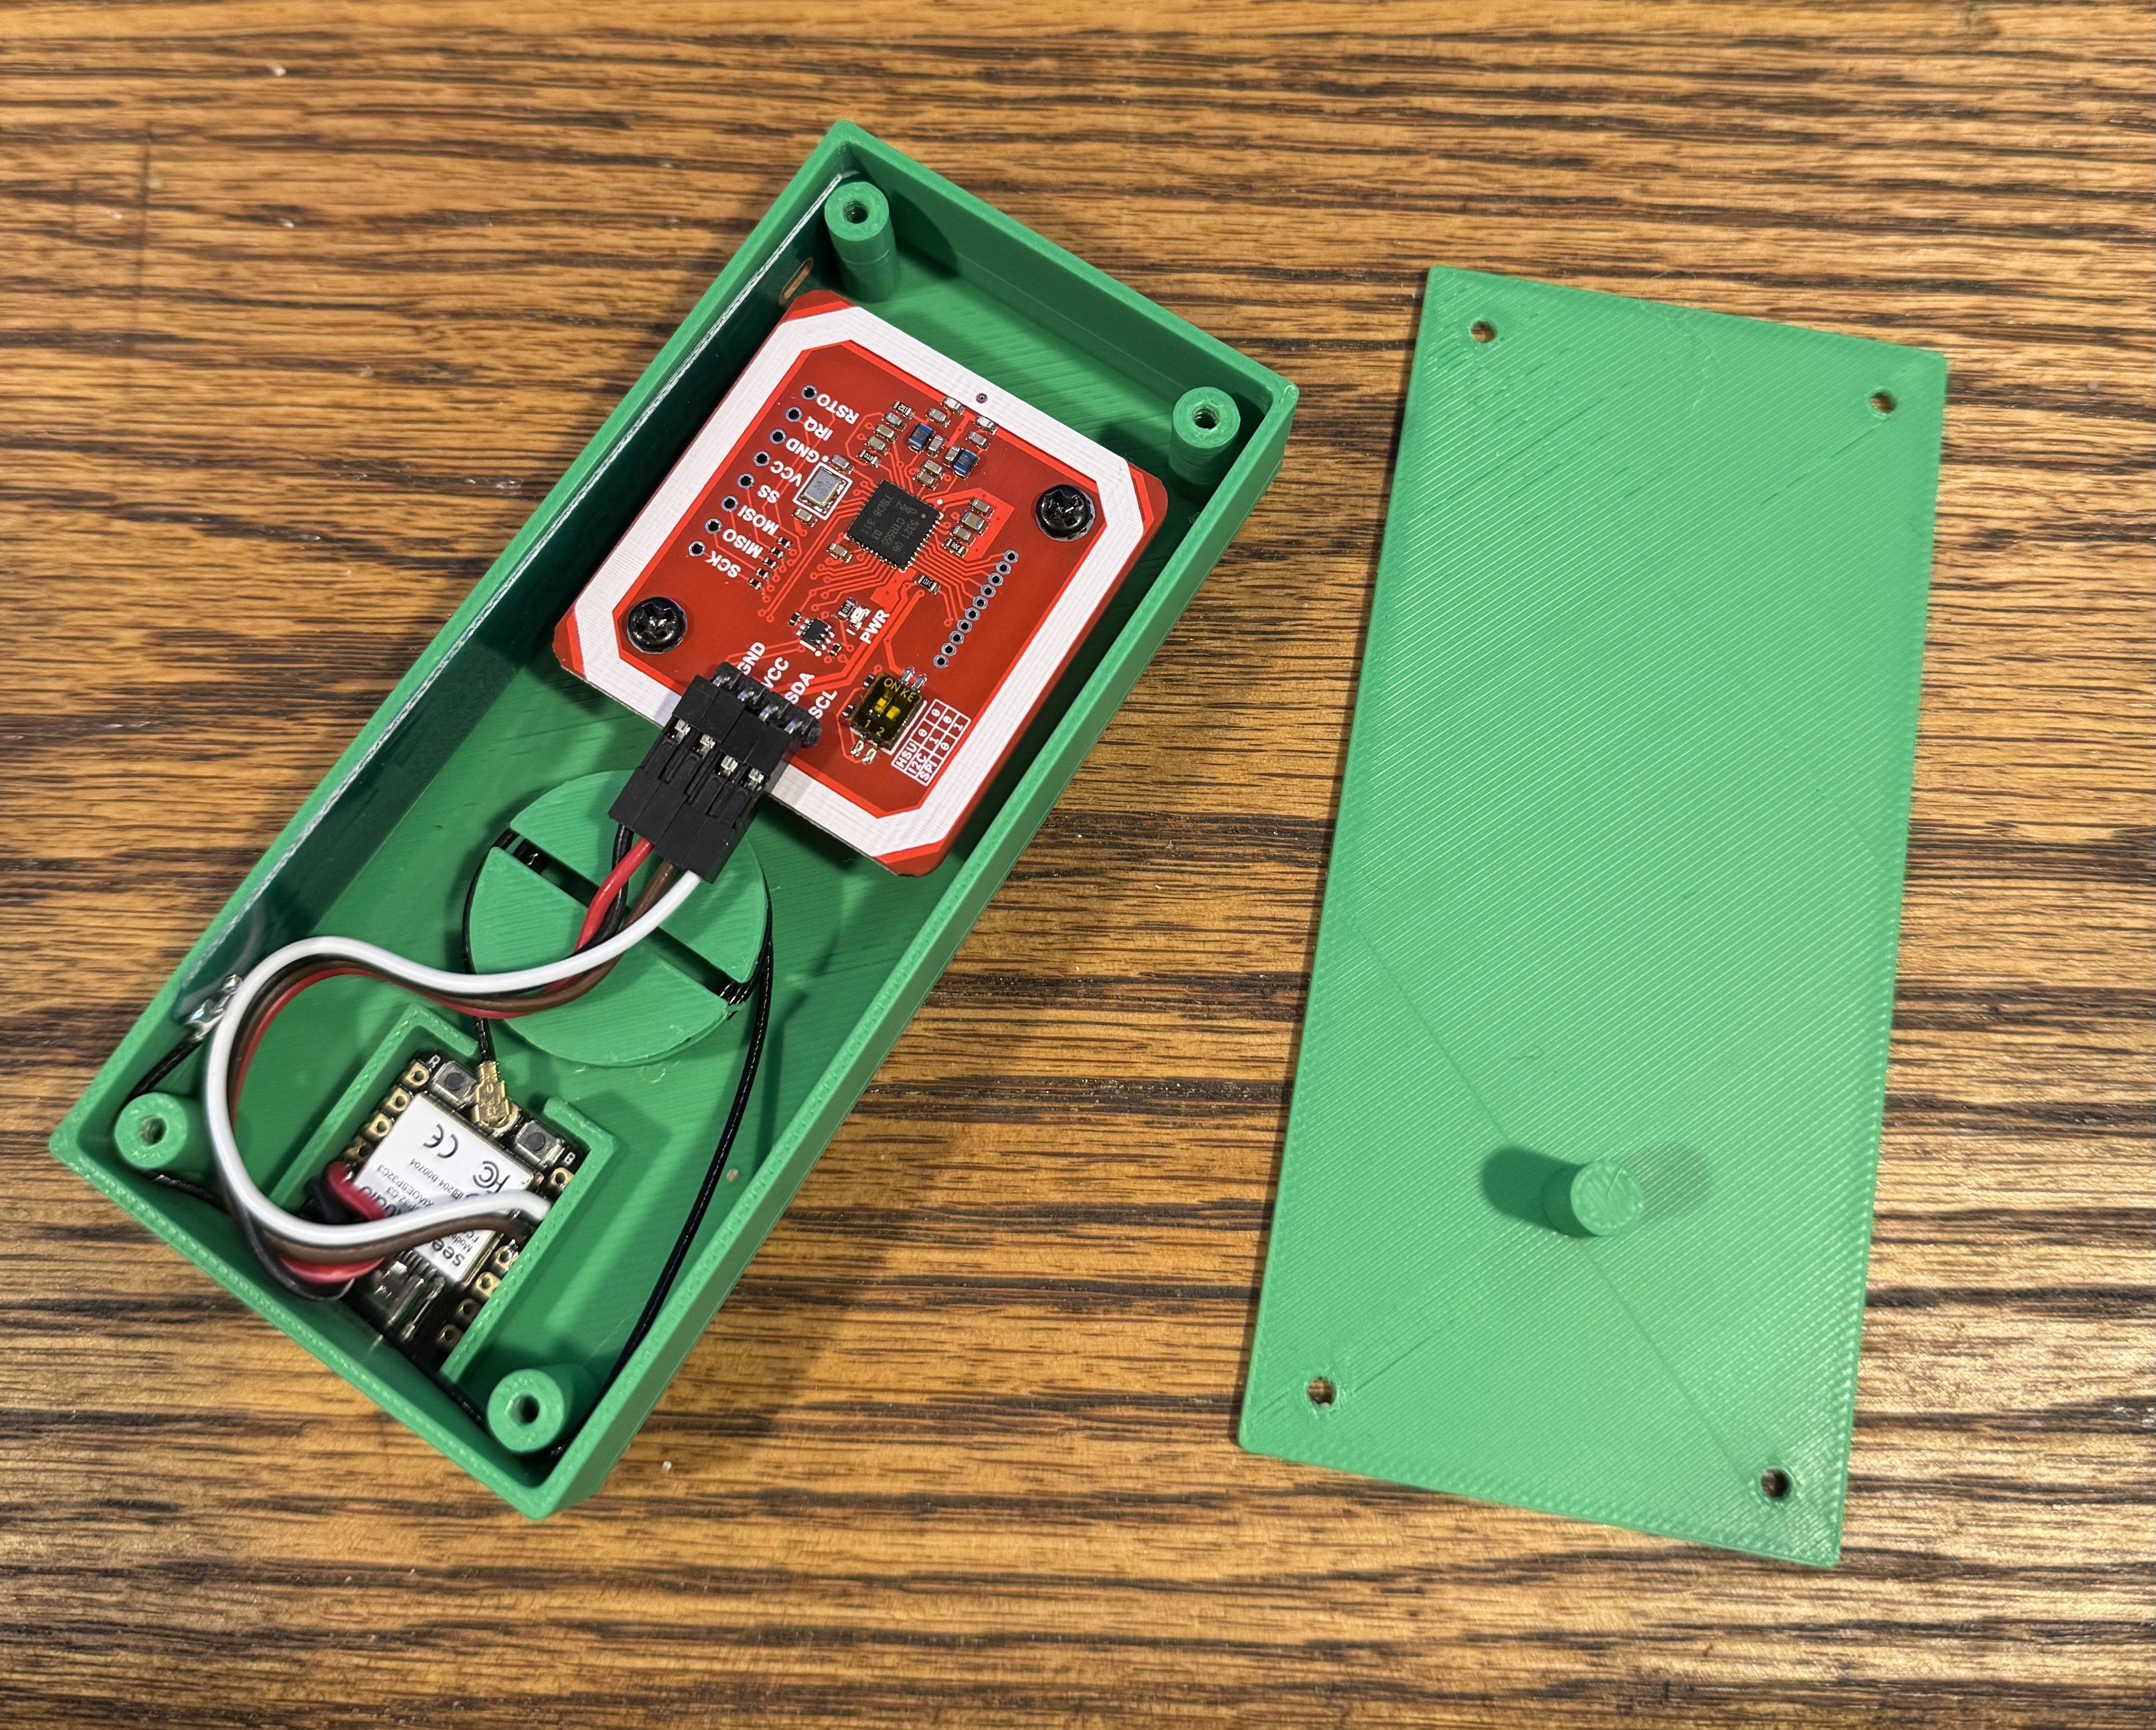
The completed unit, with the PN532 reader/writer mounted near the top, the XIAO ESP32-C3 microcontroller tucked into the corner, and the U.FL antenna cable neatly wound around the built-in spool. The lid (right) snaps on with four screws.
3D Model
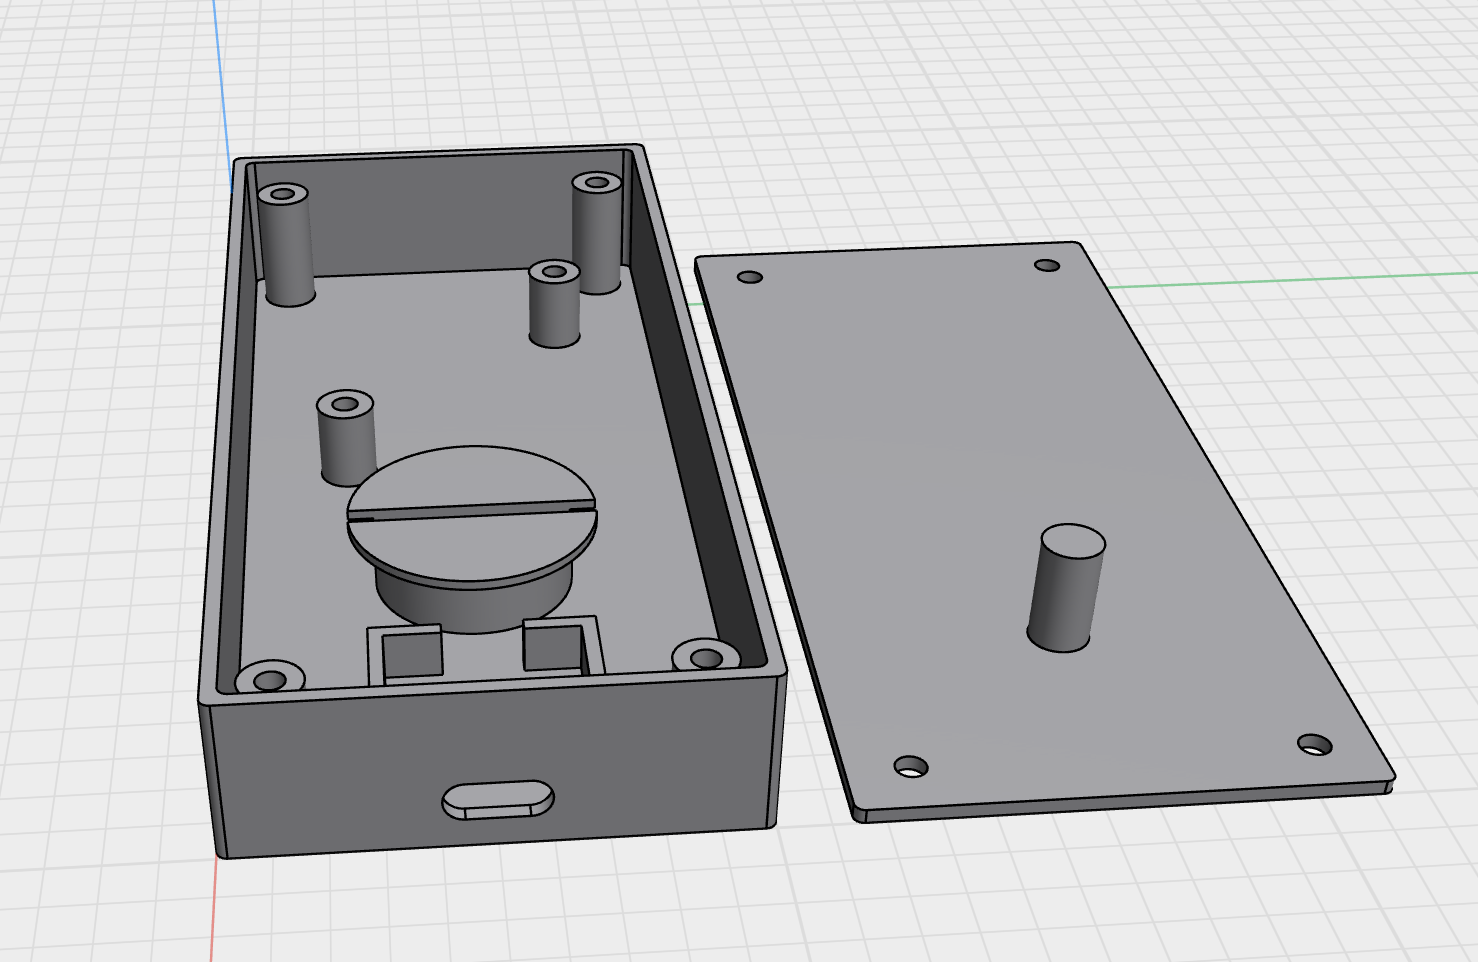
The model is provided as a 3MF file. It prints in two parts — the box and the lid — in PLA. Enable tree supports when slicing; the antenna-spool post has an overhang that needs them.
Download pn532-box.3mfSalient Features
- Built-in antenna cable spool. The 50 cm U.FL antenna cable that comes in the 2-pack is far longer than the box is wide. Rather than letting it bunch up against the boards, the enclosure includes a central post that doubles as a spool — wind the excess cable around it and the inside of the box stays tidy.
- Top-cover support post. The lid has a short cylindrical post on its underside. When the lid is screwed down it presses gently on the XIAO ESP32-C3, holding the microcontroller firmly in its corner pocket. As a bonus, the same post sits directly over the U.FL connector and prevents the antenna pigtail from popping loose if the unit is bumped or dropped.
- PN532 mounting posts. Two standoffs on a diagonal align with the holes on the PN532 for mounting. The four standoffs in the corners of the box are for mounting the lid.
Assembly
- Wire up the boards as shown on the DIY NFC page before putting anything in the enclosure — it is much easier to debug on the bench.
- Drop the XIAO ESP32-C3 into its corner pocket, USB-C port facing the cable cutout.
- Plug the U.FL antenna cable into the XIAO and wind the slack around the central spool post.
- Seat the PN532 over the two diagonal standoffs and secure it with M2 screws (or a dab of hot glue if you prefer).
- Set the lid in place — the support post should land squarely on top of the XIAO — and screw it down at the four corners.